Posted by: Jason Wood | December 6, 2010

Panforte!

Oh my, where have the days gone? December already? Christmas just around the corner? And another month gone by with no new blog post? Life has been busy though for Z-man, Supergirl and I, we have not been sitting around on our duffs for a month (more to come on that soon!).

With December comes the annual Santa Claus Parade of Lights in our hometown and friends of ours are gracious to host a big pre-parade dinner and after-parade get together for all their friends (thanks Tracey, Renee and Devon!) and every year I try my best to bring something to the potluck to say thanks and Merry Christmas. Last year was one of my first attempts at a decorated Christmas cake and this year I decided to go more traditional.

According to Joy of Baking:

Panforte (pronounced pan-FOHR-tay), is a Christmas fruit cake which comes from Siena Italy. It also goes by the name Siena Cake. Traditionally Panforte is baked in a round pan that has been lined with communion wafers (to make it easier to remove) which seems to indicate a religious connection. History does tell us that Panforte dates from the 12th century and, although stories differ, most agree that Nuns (hence the use of communion wafers) were the first to make this delicious bread.

Here is what you need:

3 oz (90 grams) semi-sweet chocolate, chopped

1 cup (125 grams) coarsely chopped and toasted hazelnuts

1 cup (125 grams) coarsely chopped and toasted blanched almonds

1 cup (170 grams) candied citrus (citron, lemon and/or orange peel)

1 teaspoon ground cinnamon

1/4 teaspoon allspice

1/4 teaspoon black pepper (optional)

1/2 cup (65 grams) all purpose flour

1 tablepspoon unsweetened cocoa

2/3 cup (130 grams) white sugar

2/3 cup honey

Butter the 8-inch tart pan and set aside. It is recommended to get a tart pan with a removable bottom. At first glance you wonder how this will not ooze the mix out the bottom but it works!

The easiest thing to do is to buy (if you can) blanched almonds and hazelnuts that have already been peeled but if you cannot then there is a really easy way to get those nuts out of their skin. Bring some water to a boil in a pot and add two tablespoons baking soda to the water and then boil the nuts for three minutes

Drain the water and the skin will slip right off the nuts. Be warned though that doing this causes the nuts to lose some of their crunchiness (which actually worked out well for this recipe). Once all of the nuts are peeled spread them out on a pan and put them in the oven to toast them

See that black mess on the counter next to the nuts? That is a pile of skins from the hazelnuts and almonds. Another note about peeling the nuts in this fashion (found out by me AFTERWARDS!) is that they bleed a nice purple juice that stains just like cherry juice so don’t wear white and have some cleaning products handy for the counter!!! Eep! Thank goodness my love was still asleep when I did this and I was able to clean it up before she came into the kitchen!!!

ANYWAYS….. here are the nuts toasty and warm just out of the oven

Chop these up into coarse chunks.

The next few steps I did not get any pictures of because it (A) went so fast, and (B) I had to work too fast to take a picture. Next time I will have someone else standing by with a camera and will do an update with these pics! Also, some of the steps are just so boring that no pictures are needed!

In a double boiler melt the chocolate.

In a large bowl mix together the flour and spices (see, who needs a picture of this?!), candied fruit, cocoa and chopped nuts.

In a small saucepan combine the white sugar and honey. On high heat stir until the sugar is completely dissolved, and then stop stirring. Using a candy thermometer boil the sugar and honey until it is 240 degrees F.

Remove the sugar from heat and pour it into the large bowl with the other ingredients and stir. Work quickly here as the sugar will set very fast. Pour (or scrape as may be!) the  mixture into the buttered tart pan and place the pan on a cookie sheet lined with parchment paper (to catch any bubbled over goodness – and to prevent my love from asking how I plan to clean the boiled and baked sugar off the bottom of the oven! Daddy didn’t raise no fool!), Bake at 300 degrees F for about 30 – 35 minutes, or until you noticed a slight glazed crust forming over the top. Remove from the oven and let cool until the pan is warm to the touch.

When the cake has cooled but is still warm to the touch remove the cake from the pan by pushing up from the bottom (you may need an extra set of hands for this unless you are practiced at it).

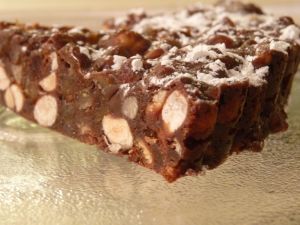
Place it on a nice display plate and dust the top with powdered sugar(for the nice holiday feeling of course!)

Slice and serve. This is surprisingly chewy and very rich, so serve in smaller slices (unless you have a large sweet tooth!)

Enjoy! If you give this a try make sure to let me know how it went for you and what people thought of it (and if you were at the Santa Parade party and tried this one leave me your thoughts on how you liked it!).


Posted by: Jason Wood | October 14, 2010

Birthday Cakes!

Where did the summer go? I cannot believe how long it has been since I have had the time to write something up. Since my last post I have had to make a bunch of birthday cakes – some good and fun, others good and horrific!

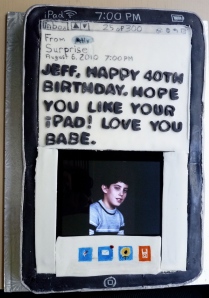
The first cake was one that a friend asked me to make for her husband’s 40th birthday. As this was one of the first cakes that I did not make for my own enjoyment, or just for the fun of it, I was so stressed throughout the whole process that the last thing in my mind was taking pictures of the process, but I did get pictures of the finished product.

The cake was an iPad. There was a digital photo frame in the cake that played a slideshow of the birthday boy over the years. As stressful as this one was to get done by the deadline and delivered, it was pretty fun overall to do.

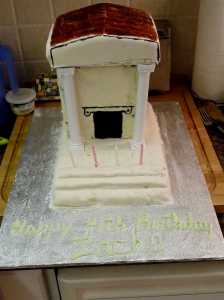
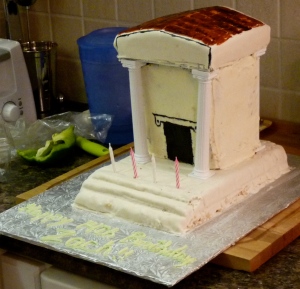
Next birthday cake was for my son and while it turned out OK, I have to say it was one of the most horrific experiences I have ever had making a cake (sorry Z-man!). Anything that could go wrong, did go wrong – rice krispie treats were too soft, I could not roll the fondant for the life of me, butter cream was runny, pillars were too high for the cake. Sheesh (and that is saying it VERY politely. There were a number of dark blue words said during the process of making this cake).
This cake was stressful in a different way than the iPad cake in that NOTHING was working right. So again… no pictures of the process. I think you should feel lucky there are pictures of the final product the way this one went!
Finally, a cake for my mother and the head nurse of the care facility where she stays (they share the same birthday). This one turned out great and was fun to make so I actually managed to get pictures of the process!

First step (and I hope this will be obvious) is to make the cakes! I used a recipe from a book that I have had forever, I purchased it as a teen in the Hershey chocolate factory that used to be in Smith Falls, ON, Canada (which has since been shut down). Awesome memories of touring a chocolate factory with an awesome gift shop at the end of the tour. This is the recipe from that book

3/4 cup Hershey’s Cocoa

1/2 cup sugar

1/2 cup water

1/4 cup shortening

1/2 cup butter

1 1/4 cups suger

3 eggs

1 teaspoon vanilla

1 1/3 cups all purpose flour

1 teaspoon baking soda

1 teaspoon salt

2/3 cup milk

Combine cocoa and 1/2 cup sugar in a saucepan; add water and shortening. Cook over low heat, stirring constantly, until shortening is melted and sugar is dissolved. Remove from heat; cool. While chocolate micture is cooling cream butter with 1 1/4 cups sugar in a large bowl. Add eggs, one at a time, beating after each addition. Add vanilla. Combine flour, baking soda and salt in a separate bowl; add alternatively with milk to creamed mixture. Blend in chocolate mixture. Pour into two greased and floured 9-inch pans. Bake at 350 F for 35 – 40 minutes or until a toothpick comes out clean. Cool 10 minutes in pan, remove from pans and cool on wire rack completely.

and here is what one of those layers look like after it is cooked, cooled and taken out of the pan

if you are like me and are a true chocolate lover then you should be drooling already, just from this picture alone. Well.. get a towel because it only gets better from here!

There are four layers all told in this cake and now we move on to the filling. First step is to pipe a layer of chocolate butter cream around the rim of the cake

this will serve to keep the filling from spilling out. Now for the filling! Strawberry whipped cream icing with fresh strawberries.

The whipped cream is made with 1 cup of heavy cream, 1/2 cup of icing sugar and 1/4 teaspoon of strawberry oil.  Beat the cream until it starts to hold its shape and then gradually add in the icing sugar and oil. Scoop some of the cream out and put it in the centre of the cake

Spread it out and throw some chopped strawberries on.

Now, there are two more layers that need to be done like this so exercise some self-control and DO NOT eat all the icing, cream or strawberries! After it is done you should (hopefully) have something like this

The slightly bent nature of the tower is really not reflective of my personality, honest, I did straighten it out as best I could. OK, next step is to dirty ice the cake and let it cool in the fridge for a while to set the butter cream

This layer is a pretty thick layer of icing for a dirty icing layer, but I was going for a thicker layer of chocolate butter cream here. You will see it smoothed out later. A tip to smooth out butter cream is to run your spatula under hot water and then run it over the icing, this will make it much easier to smooth out and the icing will not stick to the spatula. You can use a large flat putty knife (from Home Depot), works well and is cheaper than a “specialty” cake spatula! You can see the difference on the sides here after another layer of icing has been added and it has been smoothed

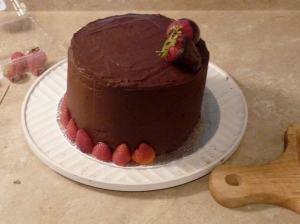
This picture kind of leads into the next step, decorating it! I dipped some strawberries in chocolate and placed them off-centre (to leave room for the text) and then cut some strawberries in half and stuck them to the bottom using small dabs of melted chocolate (edible glue when it cools)

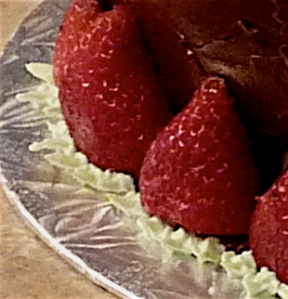
Once all the strawberries were placed around the bottom I did my best to pipe some icing to make it look like the strawberry leaves. Piping leaves is going to take a lot more practice!

I forgot to take a close-up picture of all the hard work I did on the piping of the leaves so tried to blow-up a picture of the leaves, still a little hard to see, but trust me, I worked darn hard on this!

Finally, and this is the important part, and important to get it correct or you end up on cakewrecks.com, (the nightmare of anyone that puts their cakes out there for public consumption! Worth a look if you have never visited the site, some truly awful things that make you cringe while laughing.) the message.

For those who know me and have received handwritten notes from me take note that my cursive piping skills are oh so much better than my actual handwriting. Impressive, eh? And please no comments from the peanut gallery!

Happy Birthday Mom and Carol, hope you enjoyed the cake!

Posted by: Jason Wood | July 16, 2010

A Super Birthday!

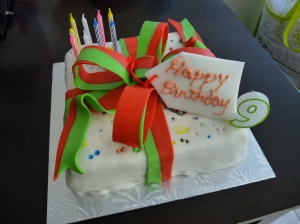
It was Supergirl’s birthday this month and what better present than a wrapped up cake? This cake was a lot of fun to make. The cake itself is a chocolate mud cake, same as was used in this chocolate fan cake (minus the rum since this one was for a kids birthday cake).

I used a 9-inch square cake for this cake. The decorations for this cake, while it may look complex, were actually pretty quick and easy to make. The wrapping paper is white fondant rolled out and placed over the cake which was covered in buttercream icing.

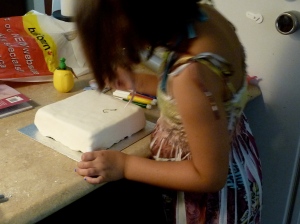
Supergirl felt that the “wrapping paper” needed decorating so she used the edible markers that we used to decorate the butterfly cake

The bow actually consists of a few different pieces. Start with two balls of fondant about the size of a baseball. Wrap one in plastic wrap to keep it pliable while you work with the other. Dye this ball green and then put one-third aside wrapped in plastic wrap.

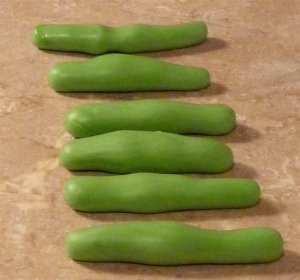
Excuse the color of the wrapped fondant, I was using pink plastic wrap and it skewed the color. Divide the larger piece into sixths and then roll each part into a small log, about 2 – 3 inches in length

Follow the same steps above for the other ball, but dye it red, then put the logs together, alternating the colors.

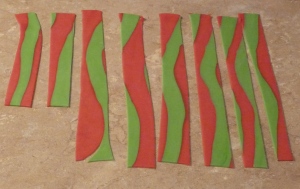
Roll this out into a sheet and then trim the edges so that you have a square, about 12 x 23 centimeters. Cut this sheet into strips three centimeters wide.

I know there are two that are smaller, you will see why later. You can cut them all the same size if you want, it’s your cake after all! ; )

To make the loops cover a paper towel roll in parchment paper and then loop  four of the strips over the roll and seal the ends together with fondant glue (or some egg white)

Put this in the fridge to fix it into this form.

With the remaining four strips cut a V-shape into each end and then shape them to reflect a draped bow – pinch the middle and raise it slightly and then twist it slightly.

Put this into the fridge as well to fix the shape.

Ok, still working on the ribbons, take the reserved fondant and form them into logs similar to what you did earlier, roll it out and trim it into a rectangle similar to the way you did before (are you sensing a theme here?), and cut into four strips, 3-cm wide each.

I just realized a I totally forgot to take a picture of this step but it is pretty straight forward. Take the strips you just cut and one-by-one place them on the cake overlapping in the middle and touching the base of the cake on each side. Make sense? You may need to trim the ends as you do not want the parts in the middle to overlap more than a 1/4-inch. This will form a slight mound of icing strips in the middle of the cake. Use a small dab of royal icing to fix in place.

Take the loops out of the fridge and arrange them so that they overlap the strips you just laid down, slightly off-centre (some on the strip and some on the white part). This will add to the little mound of fondant in the middle, but that is OK. Take the remaining strips out of the fridge and arrange them on the cake so that they cover the remaining white areas of the cake, meeting in the middle.  Use a dab of royal icing here as well to fix them in place.

There should be little pieces of trimmed fondant from when you trimmed the rectangles down, get a small piece of this and form a loop and place it right in the middle of the cake to cover the little mound of fondant that all the overlapping strips formed.

Now to make the tag. Roll out some white fondant and using a knife trim it into the shape of a gift tag

Using a thick consistency royal icing (1 egg white, icing sugar added tablespoon at a time until proper consistency is reached, and a dash of lemon juice) with some coloring mixed in pipe out your message. My piping skills are a little sad so I managed to fit Happy Birthday onto a fairly large tag.

Using a skewer punch a hole in the tag and thread some ribbon or red wool through and tie off into a loop. Prop the tag  up against one of the loops and use a dab of royal icing to fix it into place.

All set. Happy Birthday Supergirl!

Posted by: Jason Wood | July 13, 2010

Downhome Donairs

Growing up my Dad was in the CDN Armed Forces, Air Force, and we spent a large part of my youth in Nova Scotia. Anyone that grew up in Nova Scotia feels a lot of pride about the quality of the donairs that you could get there, the best anywhere. You can always spot someone that grew up back east by the tone of reverence in their voice when they speak of donairs. Not being able to get back to Halifax on anything regarding a regular basis, this is the closest I have come to recreating that taste.

Meat and a whole lot of spice – how can you go wrong?!

2 pounds ground beef, 2 teaspoons salt, 2 teaspoons flour, 1 teaspoon black pepper, 1 teaspoon Italian seasoning, 1 teaspoon garlic powder, 1 teaspoon onion powder, 1/2 teaspoon cayenne pepper

Here is all the spices in a bowl. Mix the spices in with the beef. It is important to work the ground beef so that it has a very smooth texture. You do this by kneading the beef like bread, and then picking it up and slamming it (HARD!) down onto the counter. Do this at least 20 times, and knead the meat in-between each slam.

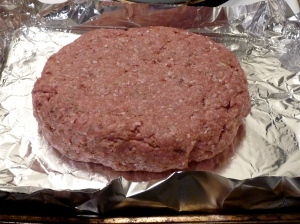
Form the meat into a giant patty and place on a foil lined baking pan. Bake at 350 F for 1 hour and 15 minutes, turning it over halfway through to ensure it is cooked evenly all the way through.

While the meat is cooking you can make the sweet garlic sauce. 3/4 cup white sugar and 2 teaspoons of garlic powder.

add 4 teaspoons of white vinegar and 1 can of evaporated milk.

Once the meat is out of the oven carve it into thin slices. Mmmm, the smell of this will have you picking pieces off and snacking the whole time.

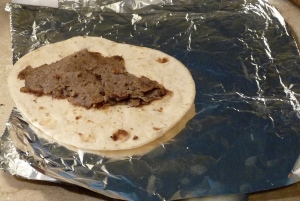
OK, time to make the donairs! You need some tortillas. Lay the tortilla down on a sheet of foil and lay a few slices of meat down.

put some sliced tomatoes, lettuce and red onions down and drizzle some of the sweet garlic sauce.

Fold the tortilla and twist the foil at one end to hold in all the juices in while you eat (donairs, while delicious, can be messy!)

Mmmm. Looks good!

Serve it up with some home fries and enjoy.

Posted by: Jason Wood | July 8, 2010

Butterflies!

One of the kids favorite teachers decided to retire this year after 30 years of being a teacher. Mrs. Ash, or Mash, every year would bring in monarch butterflies and let the kids watch the life cycle of the butterflies all the way from the eggs to the butterfly and then release the butterflies in the school yard. The kids wanted to do something special to mark the occasion and what is more special than cake?!

First thing was to work on some of the fondant decorations. A chunk of fondant and some orange coloring.

Dip the toothpick into the coloring and drag it along top the fondant making stripes.

Work the coloring into the fondant, kneading it like bread. You can coat your work surface and hands with a light coat of crisco to keep the fondant pliable.

Roll it out on a surface dusted with corn starch.

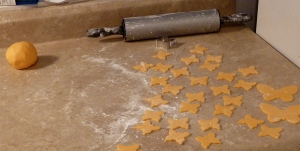
I used two different sized cookie cutters to cut out butterflies. This was the first time that I had planned a cake like this so I went a little overboard on how many butterflies I needed.

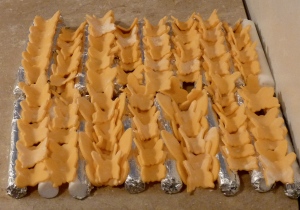
Like I said, I made a lot! Oops. To shape the butterflies I used the same technique I used in making the fans on this chocolate fan cake and wrapped some candles in foil, laid them down on the counter side by side with a little space between them and then pushed the butterflies into the gap. When they dry they look like they are in flight. I left them on the counter like this overnight.

Next thing on the agenda is the cake. I forgot to put the sugar on the counter for this picture, so don’t forget it otherwise you will end up with a pretty bland cake!

My Dad gave me this neat little scale from Lee Valley, has a tare function on it and everything, but it is little so sometimes it is hard to see the little indicator window, but I made out OK as you can see. Towers of butter and chocolate!

I had to make two cakes of different sizes (you get to see them a little later, don’t worry) but this is what you need to make one 20 cm round cake

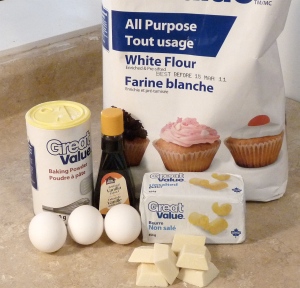
250g unsalted butter, 150g white chocolate, 2 cups sugar, 1 cup milk, 2 cups sugar, 1 tsp baking powder, 1 tsp vanilla, 2 eggs.

Put the butter, chocolate, sugar and milk in a large saucepan over low heat and stir until the chocolate is melted, Remove from heat and transfer to a large mixing bowl and let cool for 15 minutes.

Lightly beat the eggs in a small bowl and then combine the flour, baking powder, vanilla and eggs with the chocolate mixture. Preheat the oven to 325.

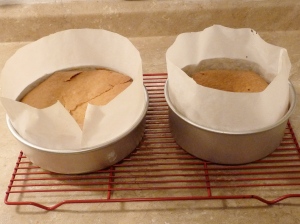
Grease the pan and line with parchment paper and pour the mixture into the pan. For one 20 cm round cake the cooking time is 1 and 3/4 hours. Check halfway through and if the top crust is browning too quickly cover it with a layer of foil. Remove the foil five minutes before the end of cooking time. The crust will be hard and sugary, that is OK. Let the cake cool completely in the pan before removing. Stick in the fridge overnight (if you have time of course).

OK, so, cakes are done and cooling but no rest for the wicked, still lots to do on this cake! At our local craft store (Michael’s – I can get lost in the cake aisles there.) Supergirl went with me this time and was responsible for this find.

Edible markers! We bought a pack and Supergirl, Z-man and myself got down to the serious task of decorating all of those butterflies. We only got about 3/4 of them done (I told you earlier I made way too many, well I did!)

The cakes have been in the fridge overnight and are completely cooled so I leveled them using a large serrated knife and put a crumb coat on them, and then back in the fridge. For those that may not know, a crumb coat is a thin layer of icing that you put on before putting a final top layer of icing on. Cakes are crumbly and when you spread icing on cakes they tend to crumble and nothing looks worse than having crumbs stick through the icing on your cake, hence, a crumb coat layer. Spreading this layer of icing will fix the crumbs in place so when you spread the top layer of icing….

it looks a whole lot better. no crumbs!

Back in the fridge! Now it is time to start work on the fondant covering for the cake (I promise that the end of this cake is in sight, really. I like all the details that lead up to the final product, if you don’t well…. skip ahead I guess, but you will miss out on the fun!) Being as the cake is about butterflies in flight it is important to have a sky so some sky blue coloring on white fondant. I totally forgot to take any pictures of the process of covering the cakes. Oops! Will try and get that next time I do a cake, I promise. But here is a nice picture of the first step of coloring the fondant. Enjoy!

The butterflies need something to land on so I picked up some fondant shape cutters, again from Michael’s – flowers and leaves. Again, I forgot to take pictures of the actual process of making the flowers and leaves but it is pretty easy. For the flowers take small amounts of fondant and add a color, roll it out. The shape cutter has on the bottom a square cutter that you use to cut out the right size square to place in the shape cutter. Once you have done this, press the top part on (like squishing a sandwich) and you should be able to peel out the cut shapes. For the flowers if you make a few different colors you can combine the different colors for the different layers of flowers for a much prettier effect. These are the flowers

and these are the leaves

As I am writing this I am realizing just how many of the steps I missed taking any pictures of. What a lousy blogger I was today! Ok, so below is a picture of the cake much farther along. Bottom two layers are cake, the top layer is a styrofoam ball cut in half and covered with fondant. It is important to put supports in the bottom layer (and top layer if using actual cake, but not so much with styrofoam layers) so I used some of Z-mans K-nex pieces shoved into the bottom layer to support the top two layers. Craft stores sell special dowels especially for this, but I forgot to buy them. The K-nex pieces were the perfect size though and worked really well. Once the cake was stacked and secured, I piped buttercream icing around the base of each layer.

Supergirl is seen here painting the back of a butterfly with fondant glue to attach it to the cake. You can see some have already been done.

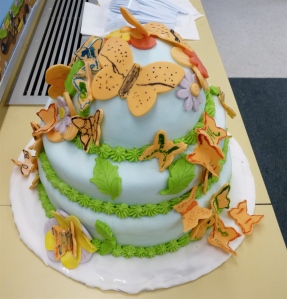
OK, well here is the finished product (told you we would get here eventually. Be honest, did you skip ahead?). All in all, about a week from start to finish. We hope that you enjoy your retirement Mrs. Ash and know that you will be missed. You were one of those people that were truly meant to be a teacher and the kids loved you. See you around!

Posted by: Jason Wood | June 24, 2010

Tortillas

Disconnect the smoke alarm, Dad’s making tortillas. These are so good and so easy to make and they make the store bought ones taste like paste. BUT….. they do make a LOT of smoke, so open the windows and take the batteries out of the smoke alarm (just for the moment I am not advising anyone to do this permanent – if I knew a lawyer they would make me put this in!)

Let’s get started, as I said easy to make, only four ingredients (five if you count water)

2 cups flour, 1/4 cup shortening, 1 teaspoon baking powder and a pinch of salt. Use a pastry blender (or two knives) and cut the shortening into the flour, stir in the baking powder and salt and then add in 3/4 cup of boiling water. Mix with a fork and then knead with your hands until a tight ball is formed.

Cut that ball in half, then half the halves, then half those halves (and if you are counting that is 8 )

then roll each of these pieces into a ball.

There is a really neat technique to do this that I learned when making BBQ pizza from the folks at King Arthur Flour. Cover these little balls with a damp towel and leave them sit for about twenty minutes. Then one-by-one flatten the balls with your hand

and roll them out

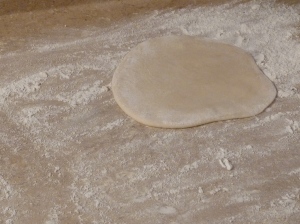
Looks like a whole bunch of flour frisbees!

OK, this is where the smoke sets in. If you have a cast iron pan this may go better for you but I don’t (on my wish list along with a stand mixer!). Using a regular frying pan, on high, no oil, no butter, nothing at all (starting to get the idea why there is so much smoke at this stage?), slap one of the dough frisbees in the pan and count to 25 Mississippi, then flip it over and do the same. You should see bubbles start to appear at about 20 Mississippi

a plate full of yummy goodness. Quesedillas, sandwich wraps, donairs or just smeared with peanut butter! Mmmm.

Enjoy.

Posted by: Jason Wood | June 8, 2010

Gumdrops!

Who doesn’t like gumdrops? Supergirl was looking for something new to try and candy is always a good option, so when I found this recipe on Recipecurio for gumdrops we knew it was something we were going to try. It was very quick and pretty easy, and as a bonus, it is not made with gelatin but pectin so for vegetarians who are missing the gumdrop experience it is perfect!

6-ounces of liquid pectin (2 pouches), 1/4 teaspoon baking soda, 3/4 cup sugar, 3/4 cup clear corn syrup. For the flavor the recipe on Recipecurio used orange extract and orange rind but Supergirl and I, thanks to a lucky discovery at Bulk Barn (will tell you more about this later!) changed it up.

Supergirl got right into the measuring, starting with the sugar

and corn syrup. These two go together into one pot. Do you like the Curious George T-shirt? Cute and retro!

In another pot is the two pouches of pectin and baking soda.

Both pots need to be cooked same temperature, same amount of time – high, about five minutes. The sugar and corn syrup should reach a boil and the pectin and baking soda will foam like crazy and boil. When the foam on the pectin disappears it is time to combine the pots. Slowly pour the pectin into the sugar (caution as both pots hold VERY HOT!!! ingredients).

Supergirl thought that the pectin smelled gross and did not like the steam and foam so while I slaved over a hot stove she played with the camera and took some self portraits.

OK, here is where we changed it up a bit and varied from the Recipecurio recipe. Instead of one flavor, we decided to try for four. I found these awesome gourmet oils at the Bulk Barn made by a company called Lorann Oils, which has all sorts of really cool stuff. These oils are so strong that, as an example, if your recipe calls for 1 teaspoon of vanilla extract, you only need 1/4 teaspoon of these oils!

Once Supergirl was finished with her glamor shots she got back to work and prepared the bowls of extract and coloring, a task that she took very seriously debating which color went best with the flavor.

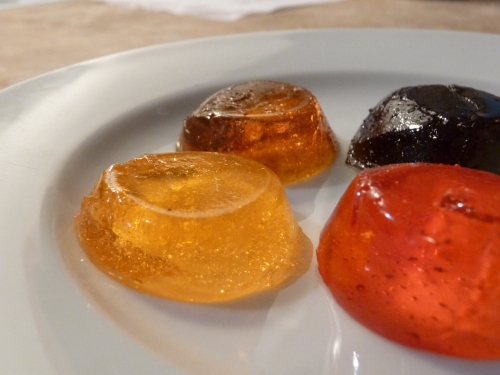
We chose (from left to right) strawberry, cherry, rootbeer and grape. The sugar and pectin starts to set VERY fast, so if you choose to make different flavors like we did, you have to move really fast to pour it into the molds. Leave it on the counter for about two hours and it will be ready to go, but very sticky still (it stuck to the plate when I unmolded them!). I found that it was firmer and more gummy the next day, the flavor was also more intense. You can also roll them in sugar (we chose not to this time, but may next time). Enjoy!

Posted by: Jason Wood | May 2, 2010

It’s the Great Pumpkin – 2010 edition.

It’s that time of year again, when pumpkin fever sets in. Last year Supergirl, Z-man and I found ourselves in possession of some Atlantic Giant pumpkins courtesy of Grandpa and we naively planted it in the midst of our garden. Well, the pumpkin thrived but at the expense of just about everything else in the garden (you can see last year’s pumpkin results here).

This year, a little older and a little wiser in the ways of pumpkin growing (we hope) we are starting much earlier. Last year we did not start growing until late June and it was almost mid-August before we had a pumpkin set on the vine and growing but we still managed to have a 50 pound pumpkin that measured 53 inches in circumference by the end of September. Our goal this year is to break the 200 pound mark, so keep your fingers crossed for us.

We will try and update every Sunday so you can see how everything is going and once we get a fruit on the vine we will post weekly circumference measurements as well.

May 2nd, 2010

First picture of this year’s contender

Isn’t he cute?

WEEK 2 – May 9th, 2010

Is it just me or does it look like he is offering himself up to the pumpkin gods?

WEEK 3 – May 16th, 2010

Don’t be deceived by the fact that the little guy looks shorter this week. Pumpkins are a shallow-rooted plant so in an effort to encourage greater root growth we piled up earth around the stalk. Looks to have given a bit of a boost as all sorts of new offshoots sprouted up this week. Next week is the May long-weekend so we will be moving outside! On a sad note though his little brother and sister will be given out to other homes, they are ready to spread their crazy growth in someone else’s yard!

WEEK 4 May 23rd, 2010

First day out in the backyard.
WEEK 5 – May 30th, 2010
After a week of hanging out in the back yard, a little bit of growth is starting. I am fine with just a little bit as I know what is coming in terms of growth so I am more than content to just the the little guy (emphasis on “little”) hang out and enjoy himself for a while!
June 24th, 2010
It has been a while since I posted an update on how the pumpkin is doing this year, and mostly because it has not been doing well, not well at all. Dead in fact. Two of them. For some reason pumpkin season is not doing well this year, so no more posts this year on pumpkins.
Posted by: Jason Wood | April 15, 2010

Pickled Watermelon Rinds

I was watching Pitchin’ In and Chef Lynn Crawford made a pannacotta with tomatoes and it got me thinking to what I could put with a pannacotta. I found this awesome recipe at The Bitten Word for pickled watermelon rinds and thought to myself, “that might work” – you can picture the light bulb over my head if you like.

This actually takes a few days to make, but it is TOTALLY worth it. I brought this to a BBQ over Easter weekend ( in Ottawa – imagine that! Those of who who live here know what I mean) and my friend Connie said it tastes just like Christmas, and it does! And your house will smell AMAZING while you are working on this.

Here is what you need to get started

All my local store had was mini-watermelons so I actually used two, but a good-sized medium one will be enough.

Start by peeling off the green outer layer of the melon, good stuff for your compost in the back yard.

Cut the rind off – easiest way to do this is to cut the watermelon in half, put it on the counter and slice the top off (see below) and then go around the edges

easy! Stick the watermelon in the fridge in a large tupperware container.

Use a spoon to scrape the pink off the rinds

then cut the rinds into strips

Put the rind into a large pot and cover with about 3 liters of water and add 3/4 cup of salt. Stick it in the fridge overnight. See, not so hard so far, right?

Next day drain the rinds, rinse  and put them back in the pot and cover them with water then boil them for about 15-minutes or until fork tender. A word of caution to not over boil the rinds at this point or it will turn into watermelon rubber. Drain again.

While the rinds are boiling in another pot combine 5 cups of sugar, 3 cups white vinegar, 3 cups water, 1 tablespoon of whole cloves, 6 cinnamon sticks (broken into smaller pieces) 1 tablespoon of allspice. Does not look to appetizing at this point, but wait until you start it boiling!

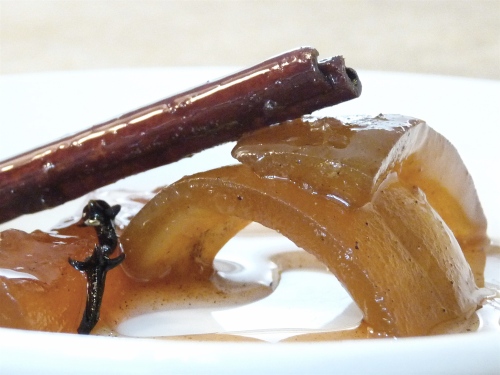
Drain the fork-tender rinds ( don’t they look totally different now?)

Pour the hot sugar mix over the rinds and then add 1 whole lemon that has been sliced. Stick it in the fridge for another night. Next day, bring the whole thing to a boil and then reduce heat to medium-high and boil for one hour. This is where your house will just smell SOOOO good. If the windows are open be prepared to have neighbors drop by just to see what you are cooking (no  joke!)

From here, if you want to give this as gifts, or store it, you can pour it into 1 pint canning jars (the guys at The Bitten Word have an awesome pic of what it looks like). Or, pour it into a serving bowl and bring to your party, like I did!

Now, the next part was to pair this up with a pannacotta. Pannacotta is so easy to make, that I (EVERY TIME) forget to take pics of how to do it. I use the recipe on Bell’alimento’s site. Watermelon and pistachio buts are a great pairing, so just plate it up and try to make it look nice. Drizzle some of the syrup from the rinds over top. SO GOOD!

Enjoy!

Posted by: Jason Wood | April 1, 2010

Mava-lous cakes!

I am not sure if Billy Crystal would like these cakes or not, but they do taste

mava-lous dahling! The cake leaves your mouth with the taste of Eagle Brand condensed milk, they are so good! Remember those stories that your mom told you about slaving all day over a hot stove? Well, these cakes will enable you to throw it right back in her face because you will be standing there for about an hour. Don’t let it discourage you though, it is TOTALLY worth it (all the best things require a bit of effort though, right?)

I found this recipe on Tartlette’s blog and if you want to see some much better photos of the finished cakes (and just some awesome stuff in general), check it out.

Start with 2 cans of evaporated milk and 1 cup of heavy cream (35% is usually the highest you can find at a grocery store although some specialty stores have higher if you can find it).

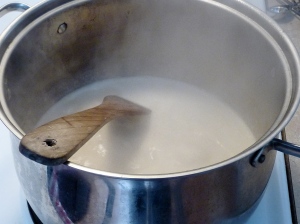
Pour the milk and cream into a large pot and bring it to a boil. Reduce the heat to medium-high for another 10 minutes. Reduce the heat further to medium and let it cook for another 10 – 15 minutes, until it starts to thicken. Reduce the heat to medium-low and let it cook for another 10 – 15 minutes. It will start to look like a butterscotch at this point, but don’t worry, you are on the right track! Turn the heat to low and cook for another 10 – 15 minutes. I had to stand and stir the entire time because I was paranoid about it scorching to the bottom of the pot, especially in the last 10 – 15 minute segment as there is not all that much liquid left by this point, just a thick paste and it needs to be stirred. I leave it up to your judgement though how you want to handle it.

This is what you should have at the end of that hour of work. Yummy!

Preheat the oven to 350 F and spray your pans with cooking spray. I used a mini-muffin tray for mine, but you can use whatever is handy, there are all sorts of cool pans and tins available now.

In a large bowl sift together 1 1/4 cups all-purpose flour, 1/2 teaspoon of baking powder, 1/4 teaspoon of cardamom, pinch of salt. Set this aside. In another bowl cream 6 tablespoons of butter and 1 cup of sugar. Add the mava to the creamed butter and sugar and blend it until it is smooth.

Add 2 eggs and beat until combined.

Add the flour mixture and 6 tablespoons of whole milk. Beat together on medium speed until smooth.

As I was using mini-muffin pans I found the easiest way to fill the pans was to pipe it in using a docorating bag, you can get big disposable ones at most craft stores or cake decorating stores. Put the bag point down in a large cup and fold the edges down and over. Scoop the batter into the bag and then fold the sides up. No fuss no muss!

Seal the end of the bag with an elastic, and snip off the tip of the bag.

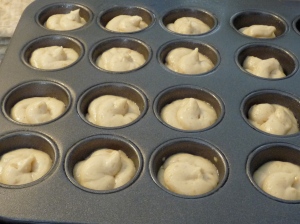
Squeeze the mix into the pans, about 3/4 full and bake for 20 – 25 minutes until golden brown.

The smell of these baking in the oven is divine! And they taste so good. It takes some serious will power not to find excuses to drift into the kitchen and pop one (or two, or three) of these. Enjoy!

Older Posts »

Categories